Technical Parameters:
● Working temperature:-20-60℃
● Input voltage:DC12~24V
● Output:3 circuit
● Connection mode:Common anode
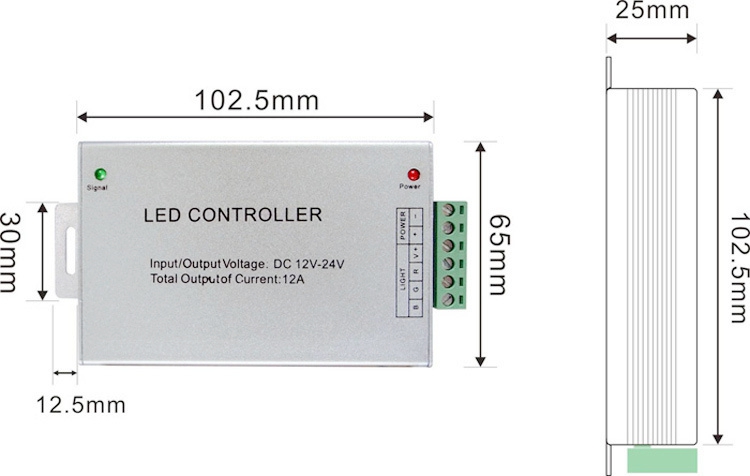
● Controller size:L130×W65×H25mm
● package size:L135×W80×H54mm
● Net weight:150g
● Gross weight:165g
● Static power consumption:<1W
● Output current:<4A/ch or <8A/ch (optional)
● Output power: 12V/4A < 144W;12V/8A< 288W
24V/4A< 288W;24V/8A< 576W
● Carton size: 56*36.5*21cm 50pcs 8.5 KG/carton
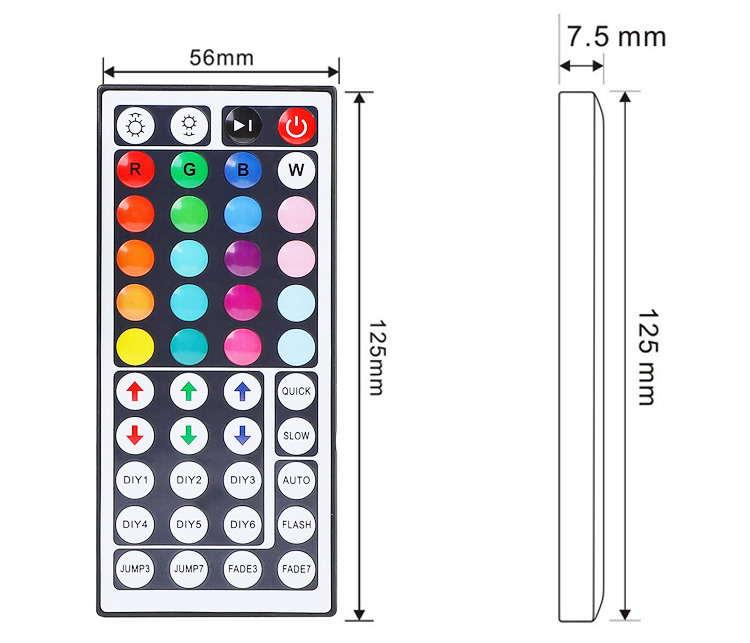
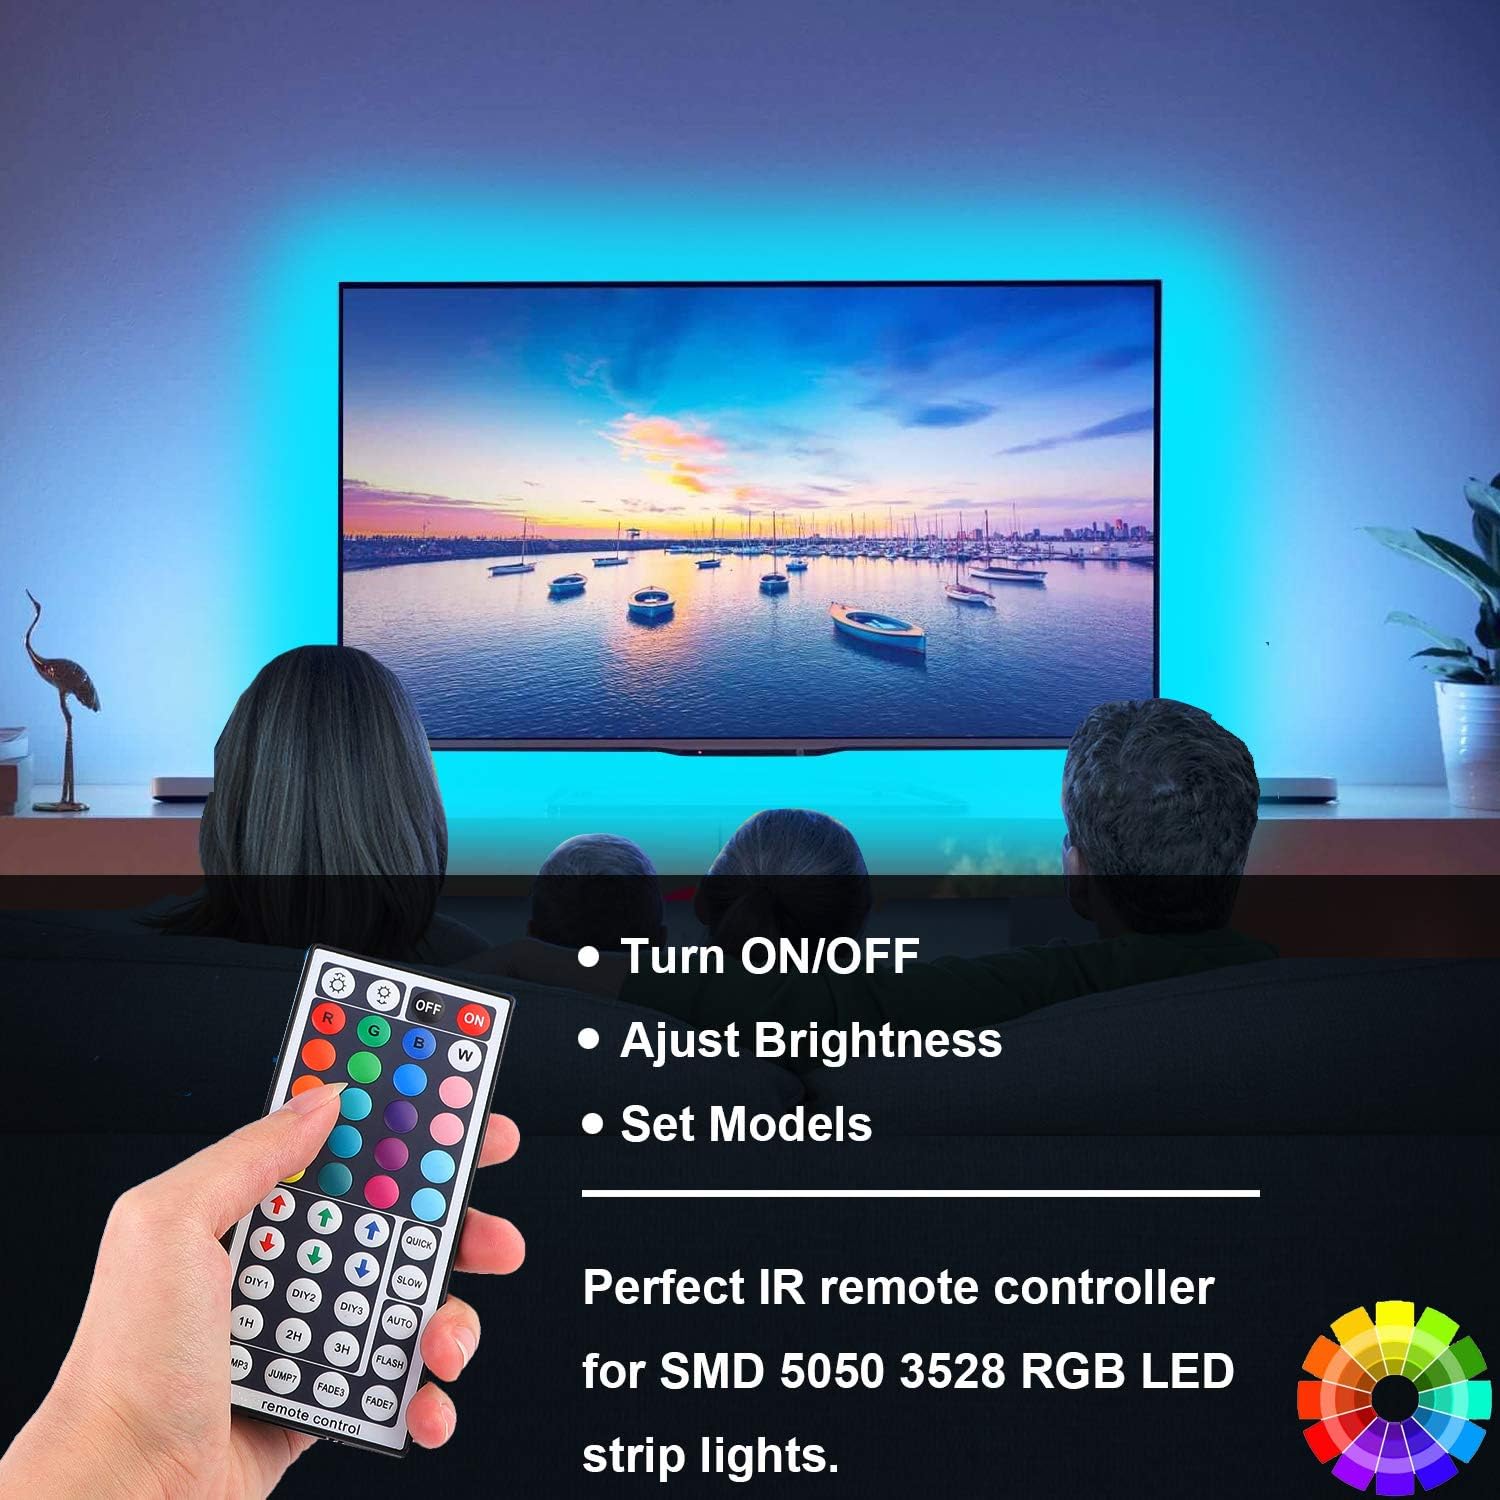
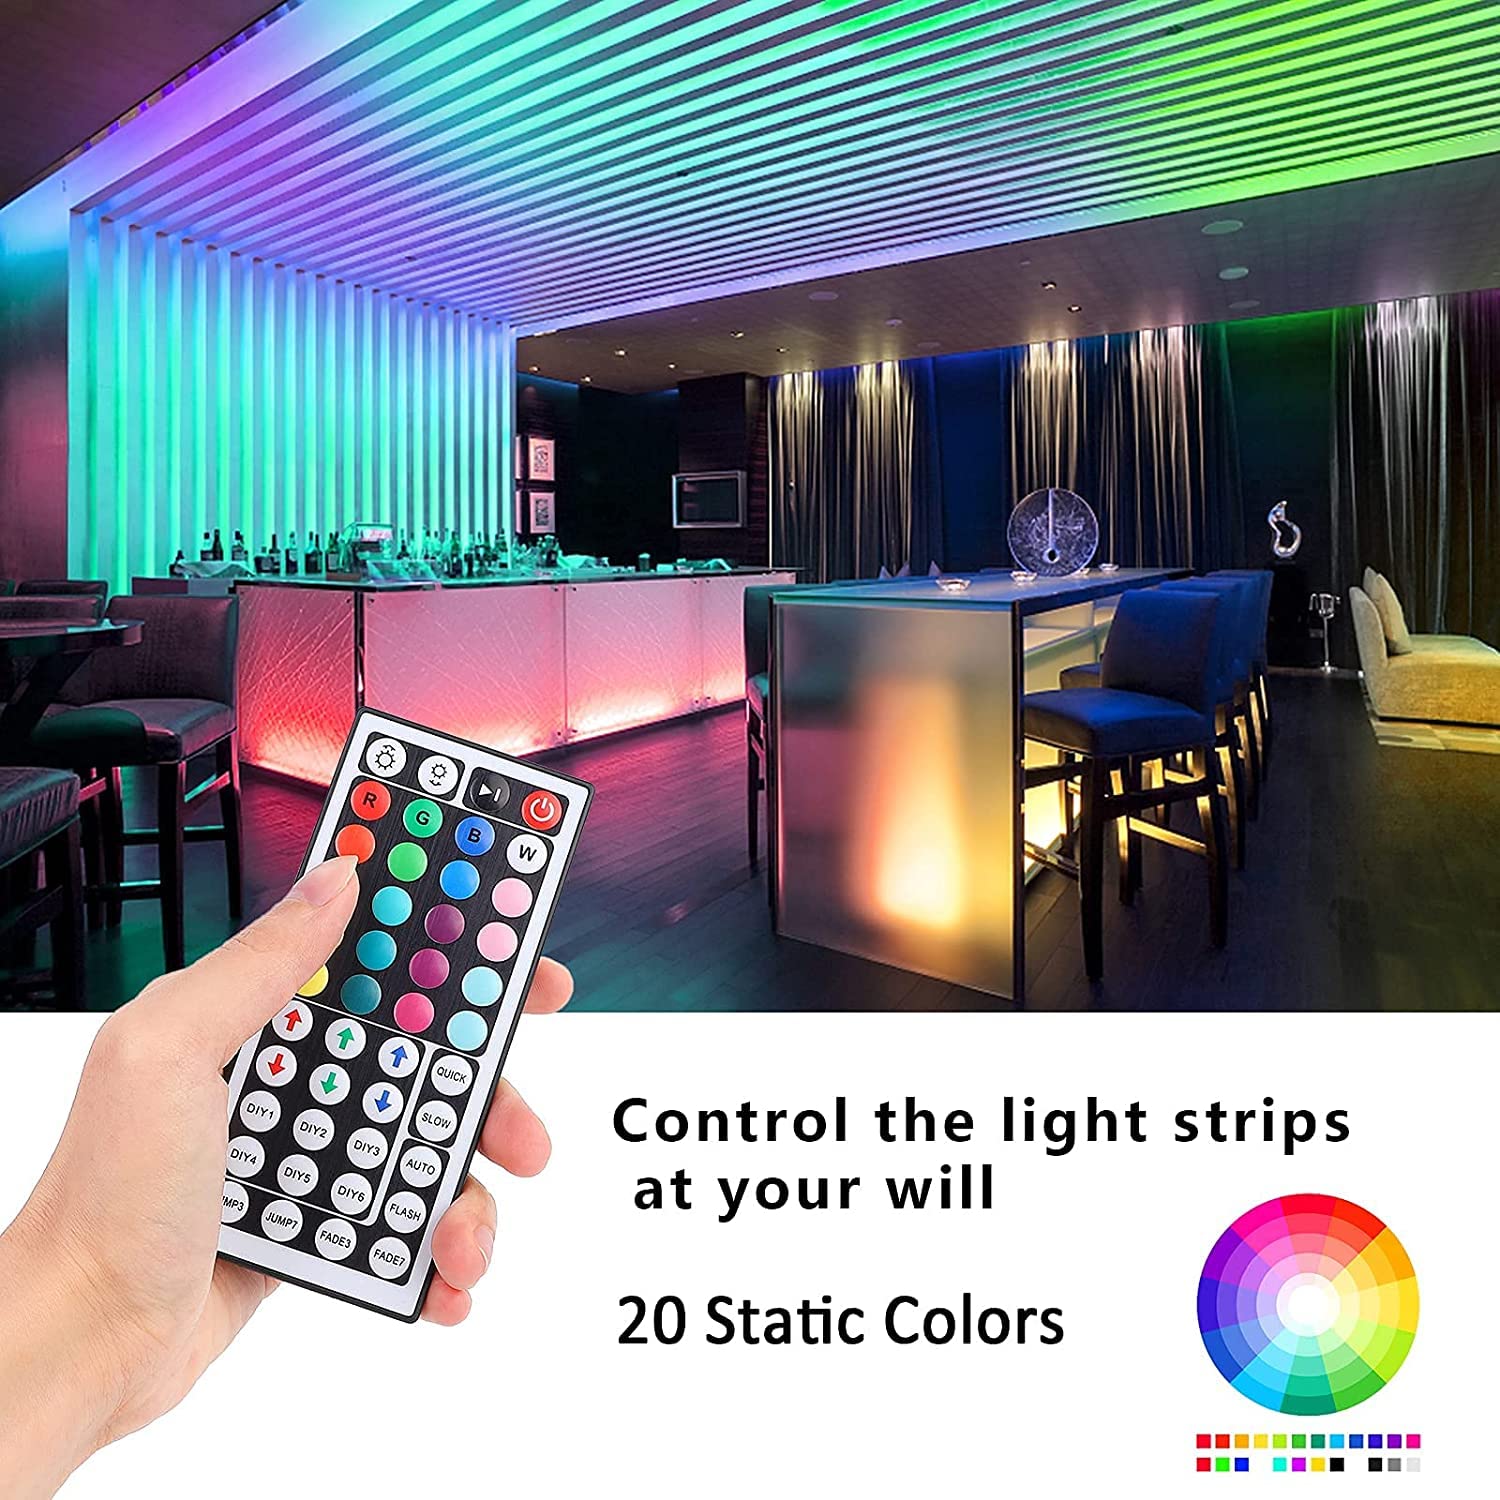
● Remote:
44 key infrared remote control
Controller Dimention:
External dimension:
Direction for use
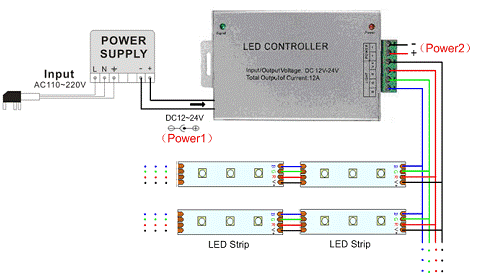
Connection description:
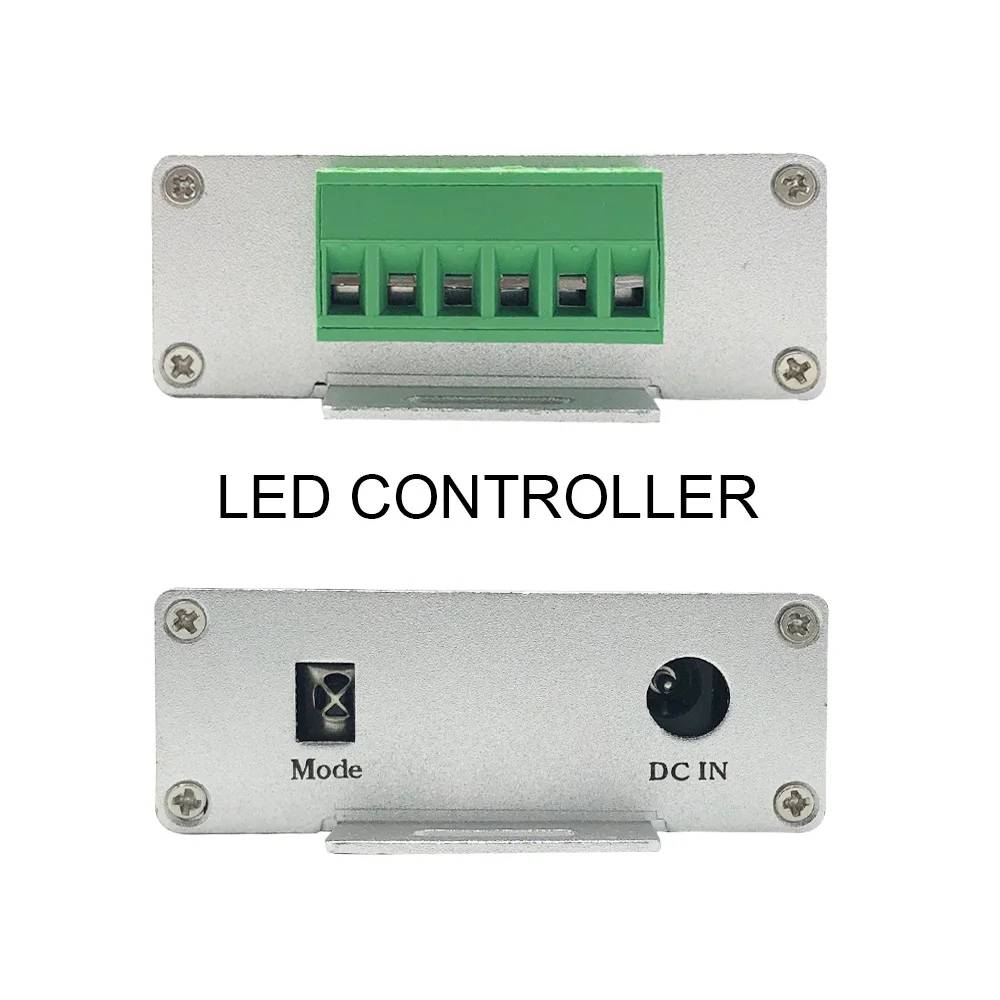
Power input interface (port1):

Adopt conventional power transposon as a DC power input interface.
Power input interface (port2): 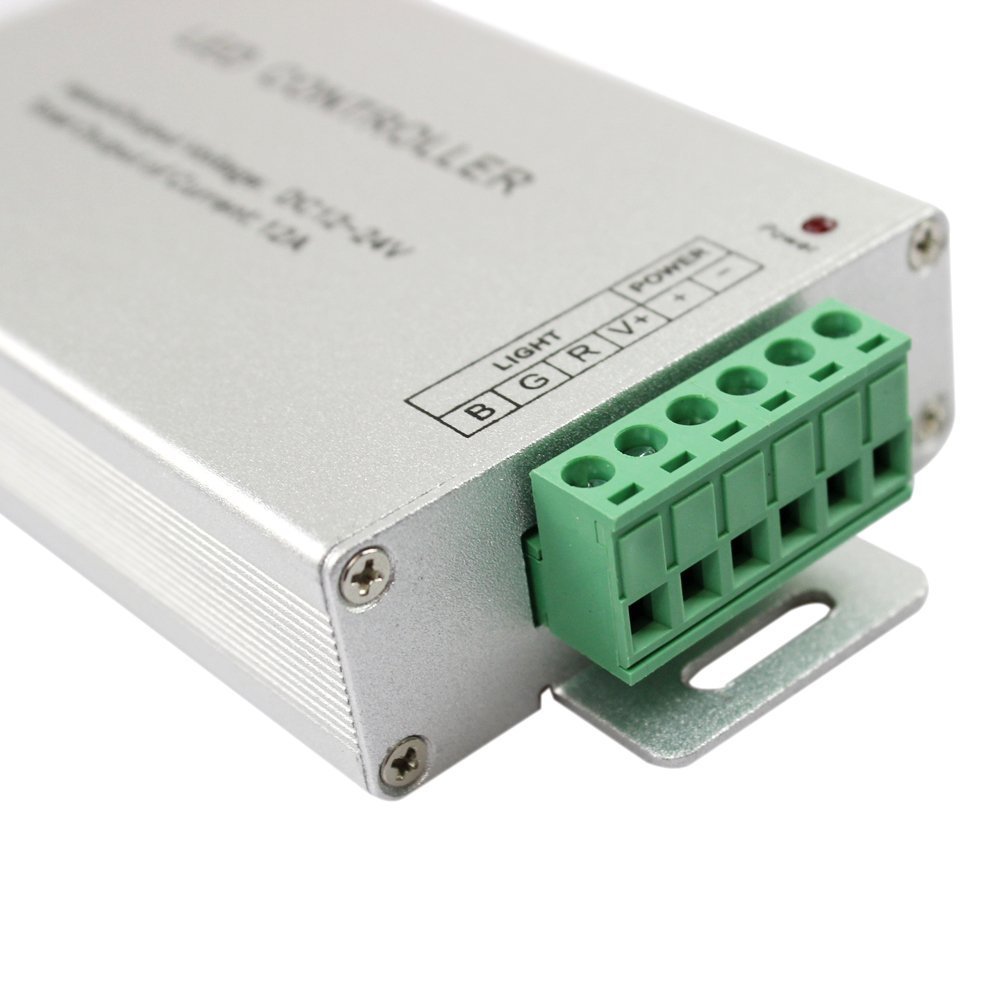
Adopt male and female connector with screw.
Load output interface:Adopt male and female connector with screw.
Direction for use:
- Connect the load wire at first,following by the power wire; Please ensure short circuit can not occur between connecting wire before you turn on the power;
- Operation: you will receive infrared remote control in front of infrared receiver to ensure that there is no barrier between the remote controllerand rece
- with the power lost memory function.
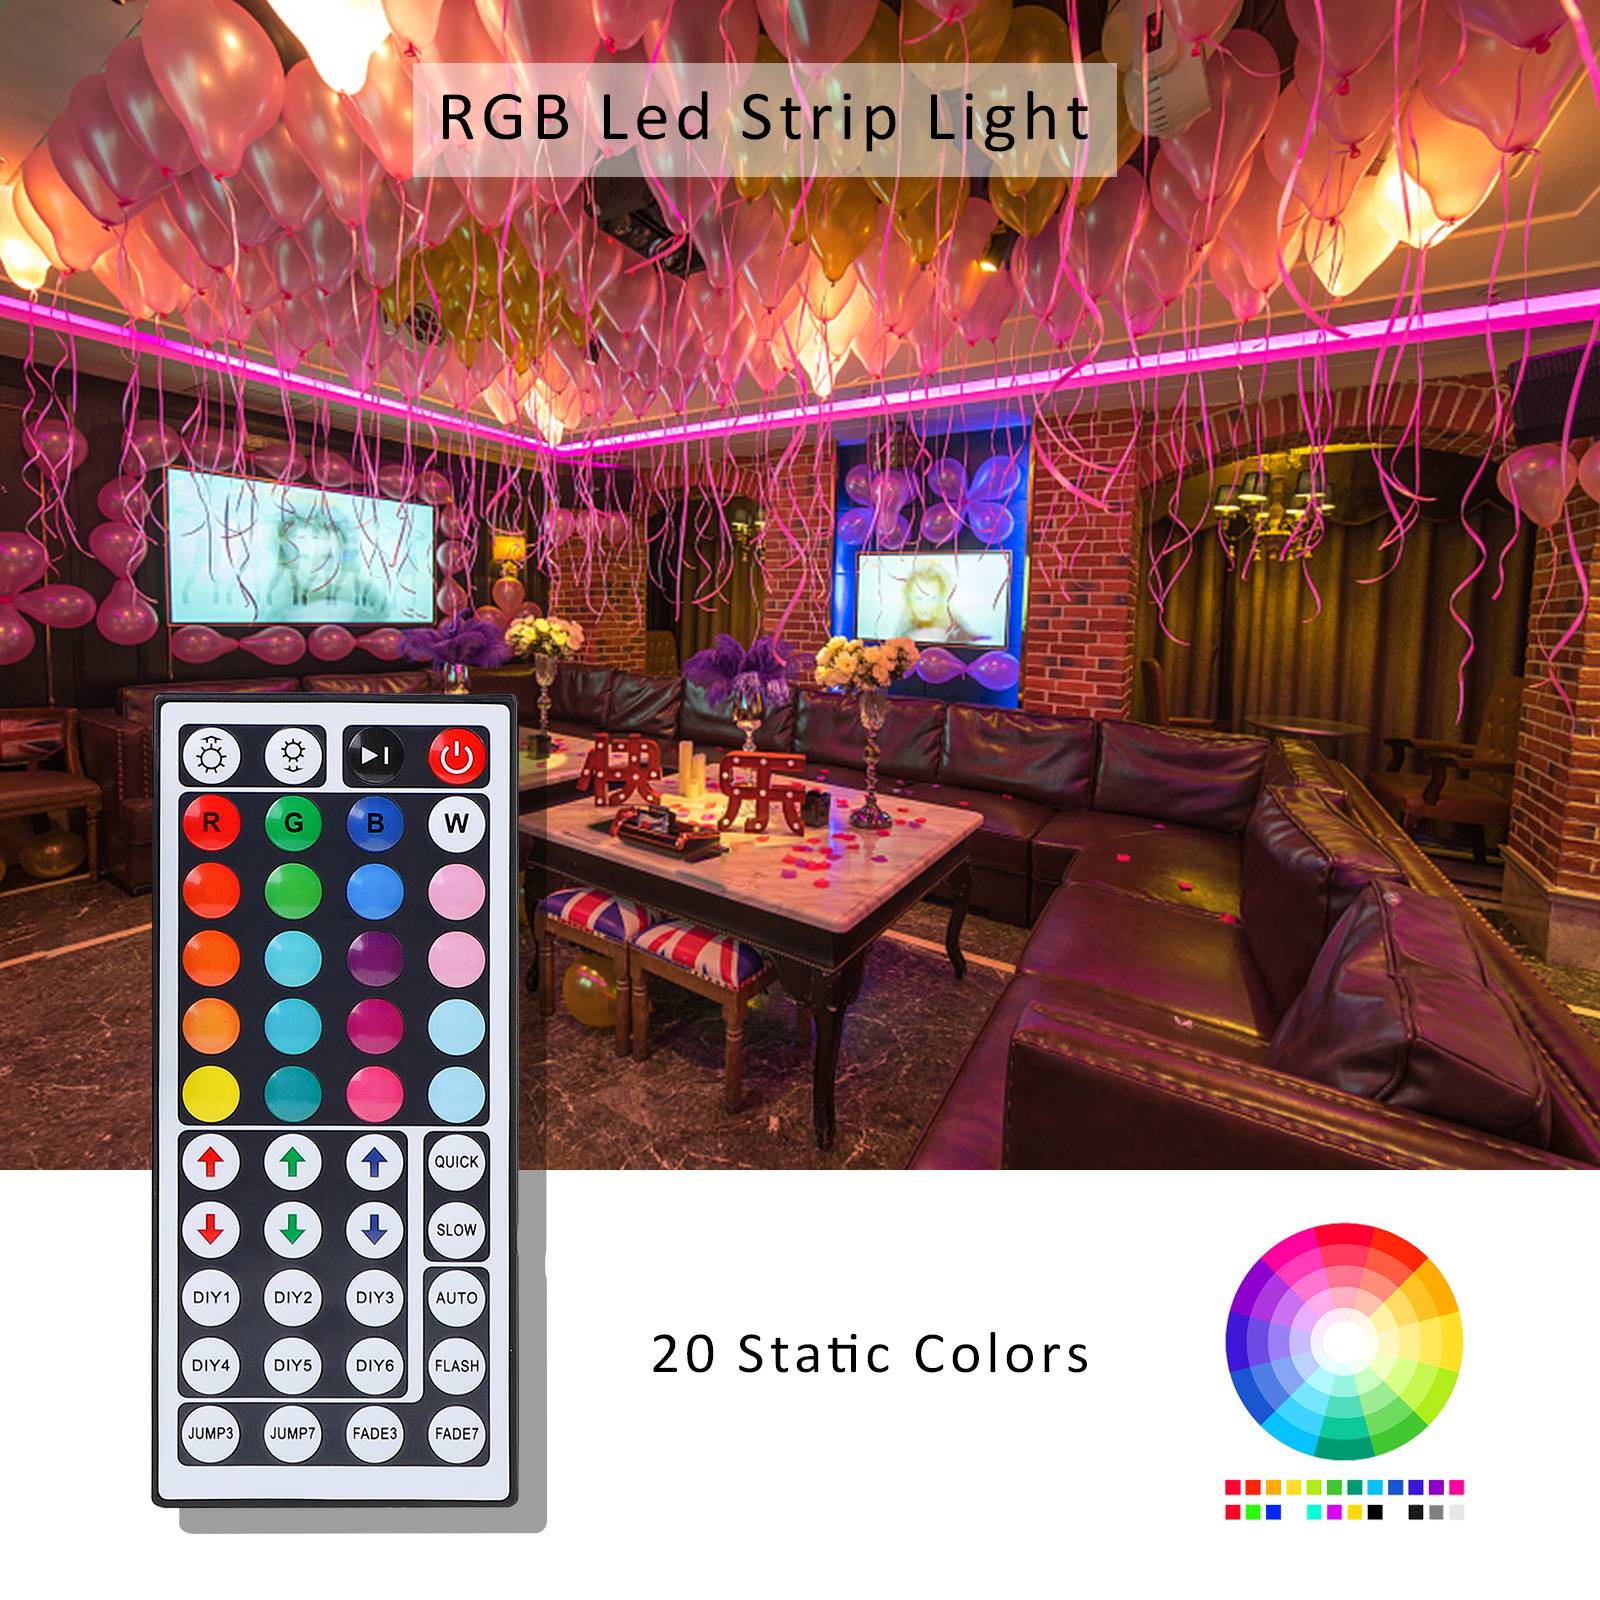
- Used the 44 key infrared remote control, the key function are as follows:
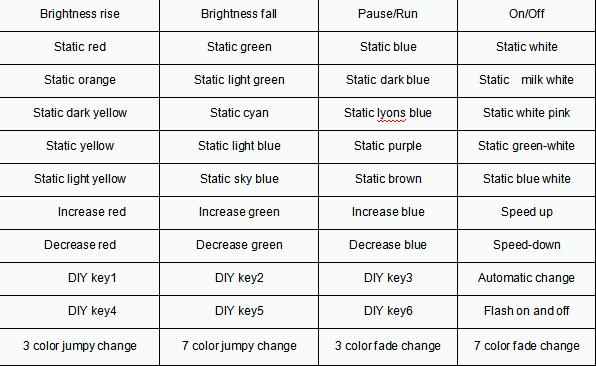
Supplement:About DIY key, when it’s pressed first time, will enter the DIY color mode, you can adjust the color per the 6 keys at above to increase or decrease the R/G/B color by yourself freely(if other key is pressed this time,will jump out from DIY color mode). And you can save the color which you have adjusted by pressing the DIY key once again. When next time this key is pressed, it will show the color you saved last time.
There are 6 DIY keys, so you can save 6 colors you like. They are all Independent, have no effect each other. For example: if you press DIY key1 first, and then press DIY key2, DIY key1 will be invalid, until DIY key2 is pressed once again, current color will be saved.
Connection description:
Attention:
1. This products Input voltage is DC12V-24V,other input voltage are not allowed.
2. Lead wire should be connected correctly, according to the wire color and the connecting diagram offers.
3. Please do not overload, the total max output current is 4A/CH or 8A/CH.
4. Please ensure that adequate sized cable is used from the controller to the LED lights to carry the current.
Please also ensure that the cable is secured tightly in the connector.
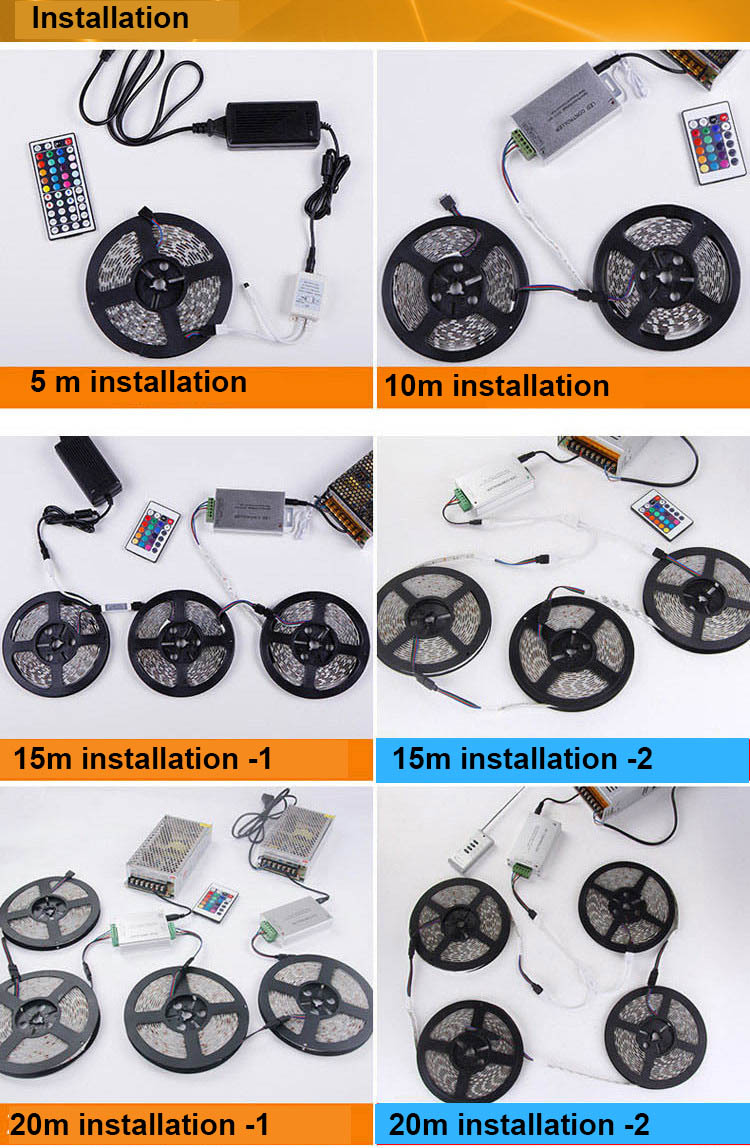
Application:


 Adopt conventional power transposon as a DC power input interface.
 Adopt male and female connector with screw.


